Atlantis - Trapping the Flesh Creature

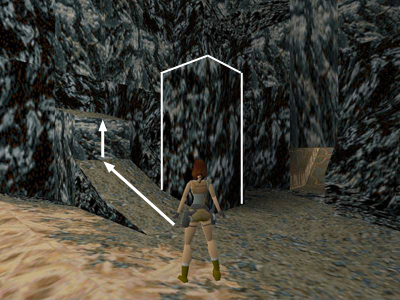
Head for the tall column near the entrance. (It's kind of hard to see in the screenshot above, so I've outlined it in white.) Walk up the short ramp next to it and climb onto the block above the ramp.

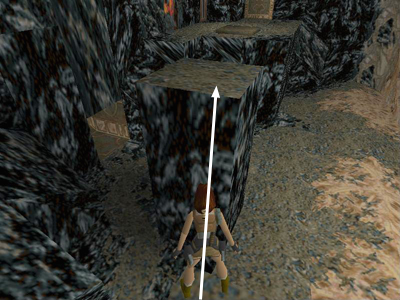
Turn around and take a standing jump onto the tall column.

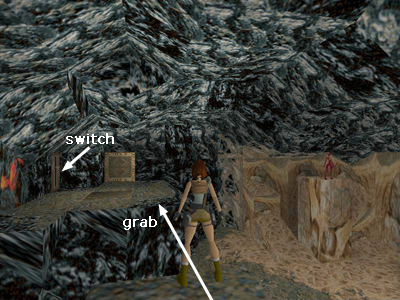
From here, you can see how Lara's doppelganger has mimicked her movements using the tan blocks on the other side of the room. Now take a running jump to grab the right side of the raised platform ahead. Pull up.
Here you'll see a switch, a trapdoor in the floor and the exit door. Pull the switch to open the trapdoor above a lava pit. You have a little over 40 seconds before the trapdoor closes. So you don't need to rush, but don't dawdle either.

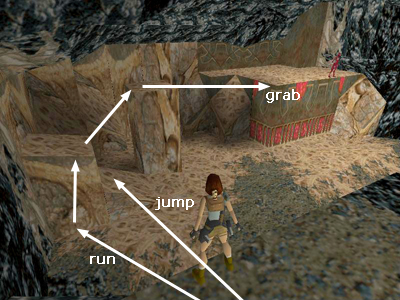
Roll, run past the exit door and jump at the edge to land on the low ramp ahead. Then climb onto the low block at the top of the ramp. (Or, after throwing the switch, roll and run off the platform, slide down to the ground, run forward to the side of the block and vault onto it, avoiding the ramp altogether.) Jump onto the tall pillar. Now take a running jump to grab the platform and run to the middle. The flesh creature should then run to the middle on her side and fall into the lava pit. When she does, the exit door near the pit will open. Drop down to the floor, climb back up the gray rocks to the other platform and go through the door.
Walkthrough text and diagrams copyright © 1998- Stellalune (email ). All TR1 screenshots were made using Glidos and Fraps. Feel free to copy or print this walkthrough for personal use. By all means, share it with friends, but please include this credit line so people can send me their feedback. No part of this walkthrough may be reproduced on another site without permission. Follow this link for details about this site's advertising and privacy policy.