Fourth Challenge Tomb - Single-Player Version (Part 2)
After destroying the 2 Marks of Set to open the gates, as shown in part 1, you're now ready to move the first time bomb.
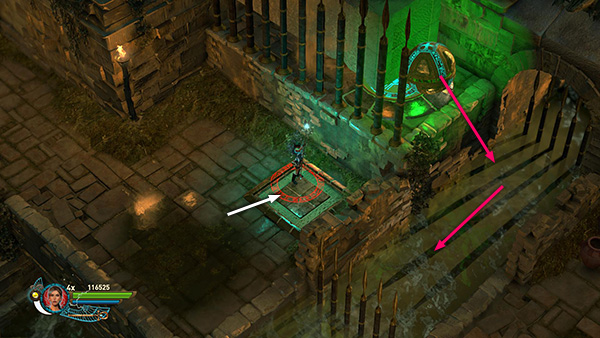
Raise the Staff of Osiris and keep it up throughout the entire sequence to prevent the time bomb from exploding prematurely. Step on the pressure pad near the bomb to push it off the ledge into the water. As the current starts to carry it downstream...
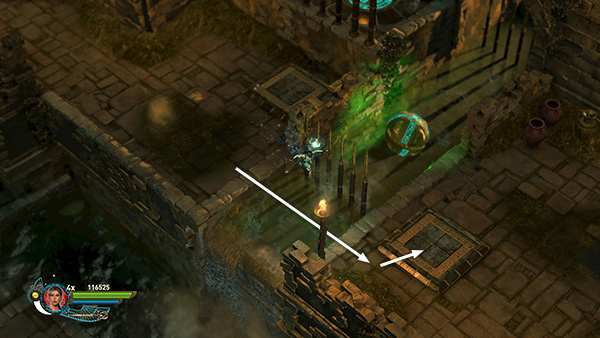
Jump across the water and stand on the pressure pad on the other side...
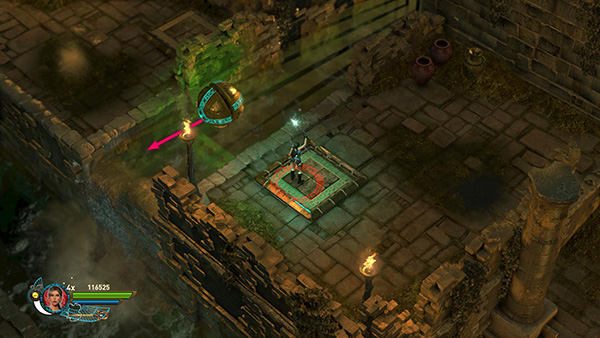
...to open the gate so the bomb can pass.
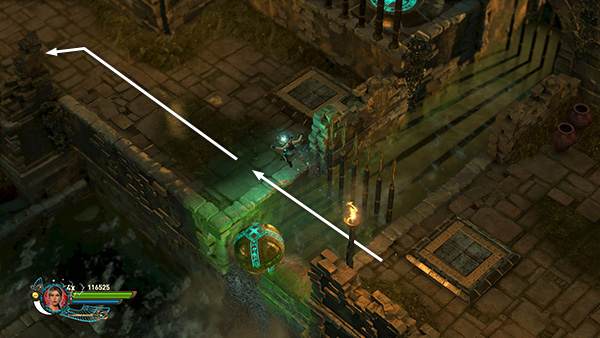
As soon as the bomb clears the gate, jump back across the water, run forward and around to the left...
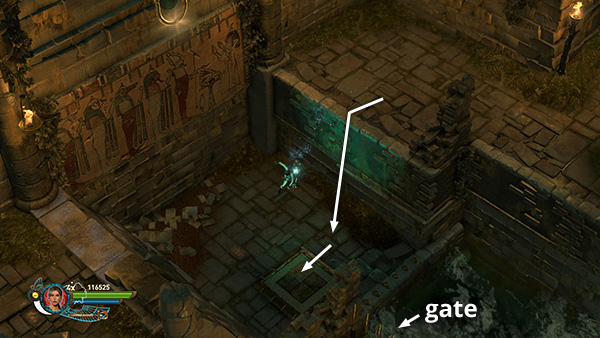
...and drop down into the area beneath the grapple ring. Stand on the pressure pad there to open the next gate.
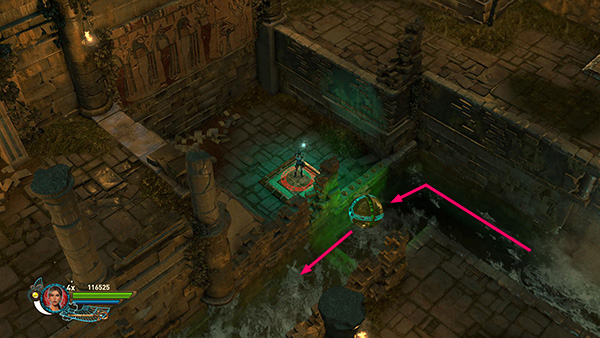
As soon as the bomb comes around the corner and passes through the gate...
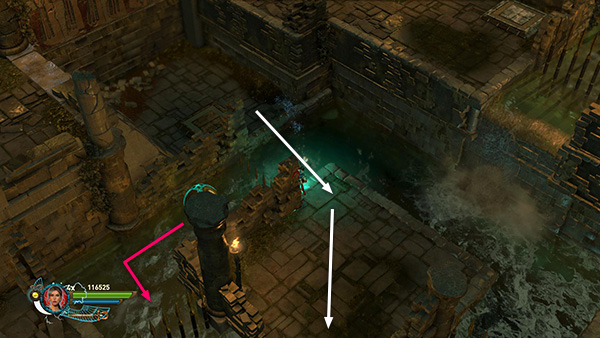
...jump across to the square platform with water on all sides, move to the lower corner...
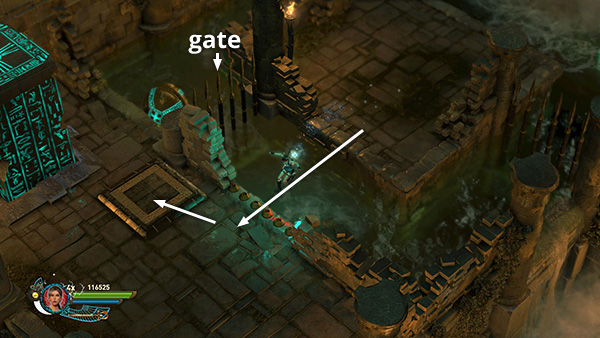
...and jump across the water to the next ledge on the left. Stand on the pressure pad near the column with Osiris's Glyphs to open the next gate so the bomb can pass.
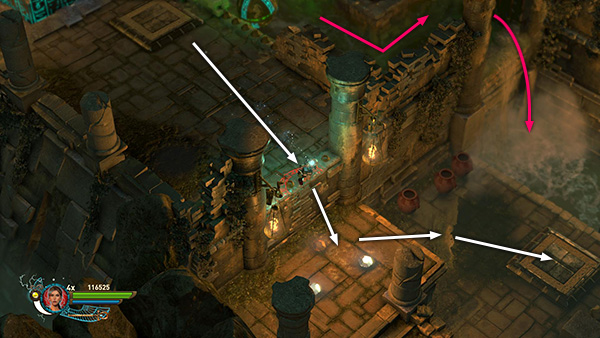
When the bomb clears the gate, run to the lower right, through the gate you opened earlier by destroying the Mark of Set, and into the room below.
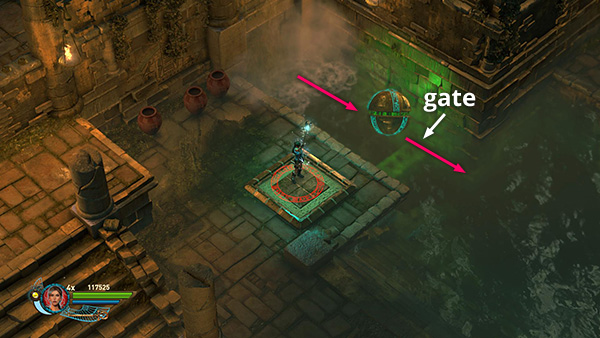
Stand on the pressure pad there to hold open the next gate, so when the bomb comes down over the waterfall it floats out into the middle of the pool.
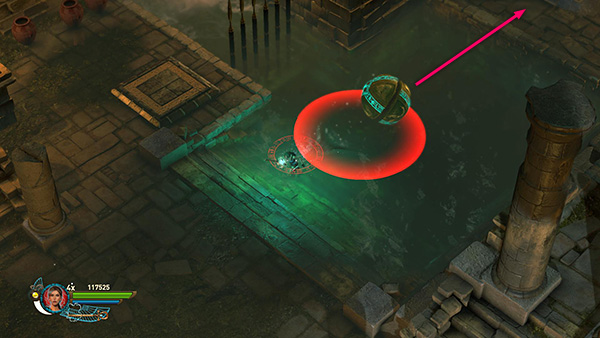
Now jump into the water and drop a remote bomb behind the time bomb so that when you detonate it, it flings the bomb up onto the ledge above on the right.
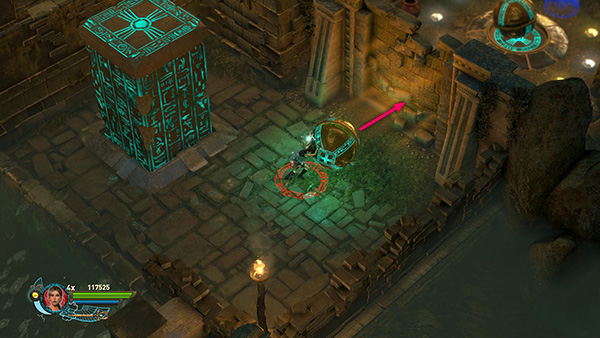
Climb out of the water and push the bomb against the crumbling wall. Now you can lower the staff and let the bomb explode.
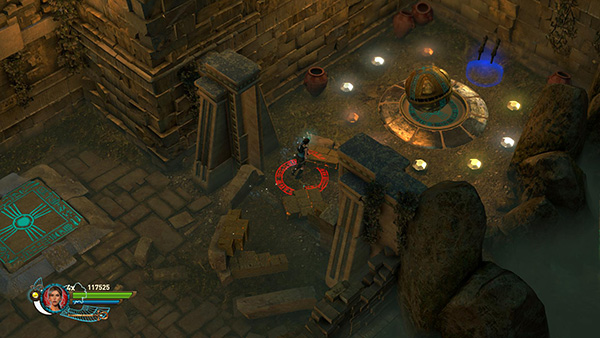
Go through to find some gems, the DUAL SUBMACHINE GUNS, and another time bomb.
[Part 1 | Part 3 | Return to the Challenge Tomb Walkthrough]
Copyright © - Stellalune (
). All rights reserved. The screenshots and videos included here were made using Fraps. Feel free to copy or print this walkthrough for personal use. By all means, share it with friends, but please include this credit line so people can send me their feedback. No part of this walkthrough may be reproduced on another site without permission. Follow this link for details about this site's advertising and privacy policy.