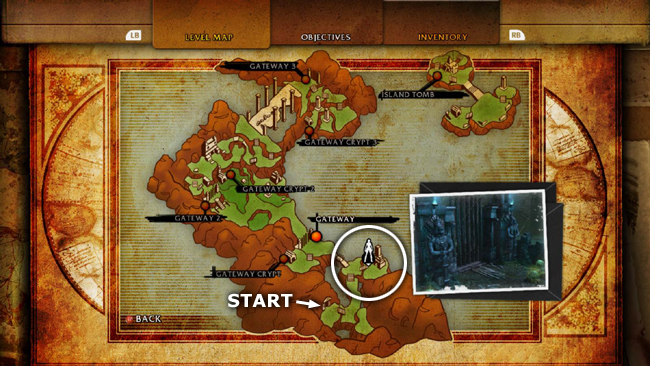
This area is shown near the lower right of the level map; it's the green area with the buildings just below the black label indicating the first gateway.
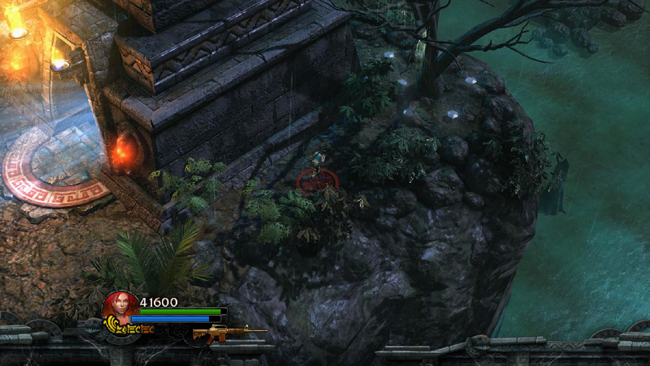
Go around to the right side of the tomb. You'll find some gems here, and another lizard will sneak up from behind.
Throw a spear into the outer wall of the Challenge Tomb and climb onto the roof to find another red skull (2/10).
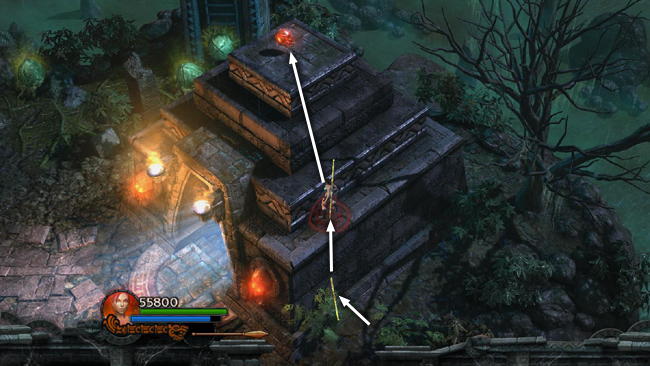
Jump down from the roof onto the broken column on the left. (Or drop down to the ground, deal with a few more lizards. Then jump on top of the broken column.)
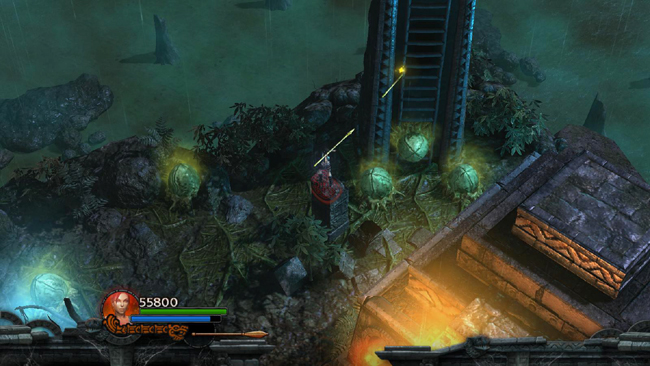
While standing on the column, throw a spear into the tower just above the pods clustered at the bottom.
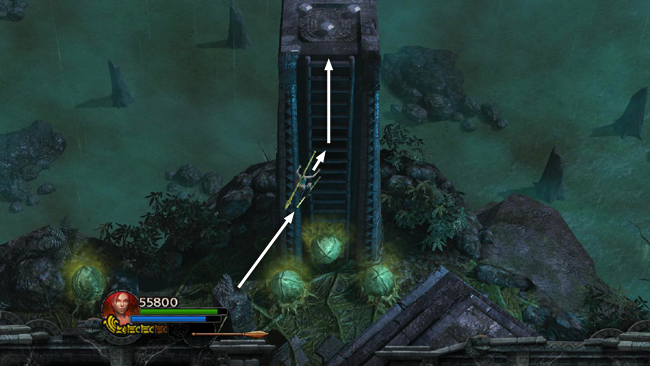
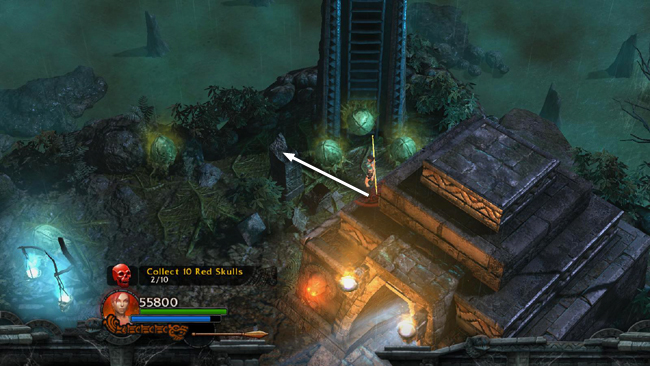
Jump onto the spear and then climb the ladder to the top of the tower, where there are more gems.
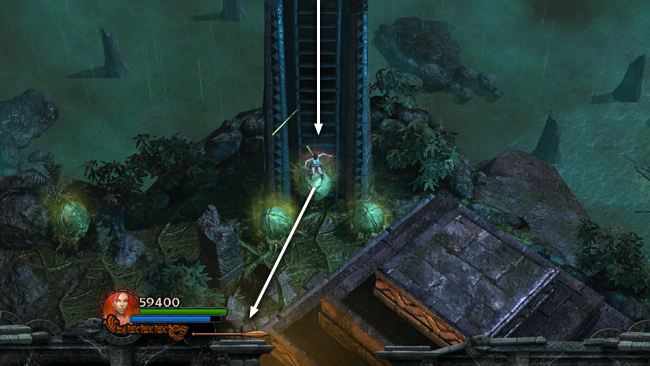
Climb back down to the spear and jump clear of the pods.
[Return to the Toxic Swamp Walkthrough]
Copyright © - Stellalune (). All rights reserved. The screenshots and videos included here were made using Fraps. Feel free to copy or print this walkthrough for personal use. By all means, share it with friends, but please include this credit line so people can send me their feedback. No part of this walkthrough may be reproduced on another site without permission. Follow this link for details about this site's advertising and privacy policy.
|