
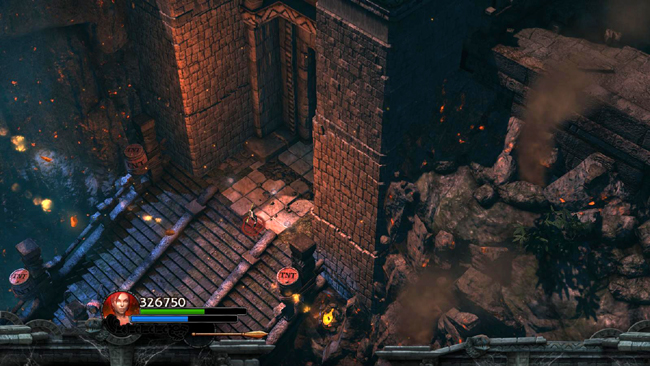
Start up the staircase to trigger a cut scene: large balls, some of which are on fire, begin rolling down toward you. One of the fireballs hits a barrel of TNT, setting it off and igniting the fuses connected to the other barrels of dynamite positioned at intervals along the stairs.
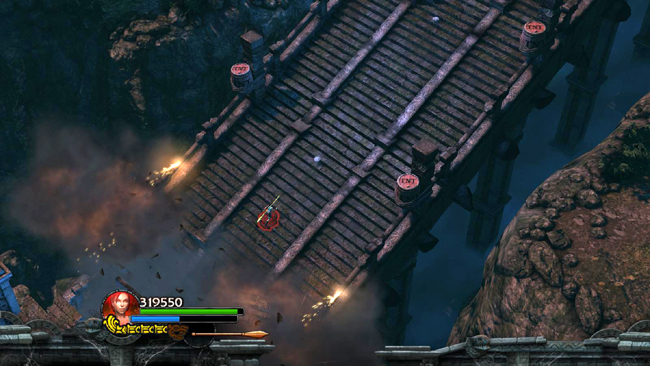
When they explode, the bottom of the staircase is destroyed. As soon as you regain control of Lara, start running up the stairs, avoiding the rolling obstacles as much as possible and keeping ahead of the explosions that knock out each section of the stairs behind you.
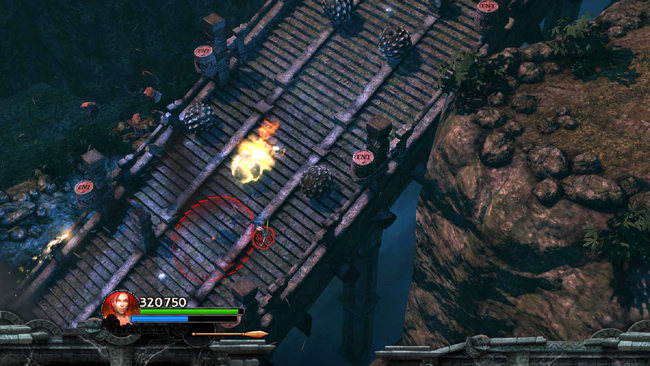
This is also the site of a Reward Challenge: Bomb the rolling fire. To do this, drop a bomb in the path of one of the fireballs and detonate it just as the fireball passes.
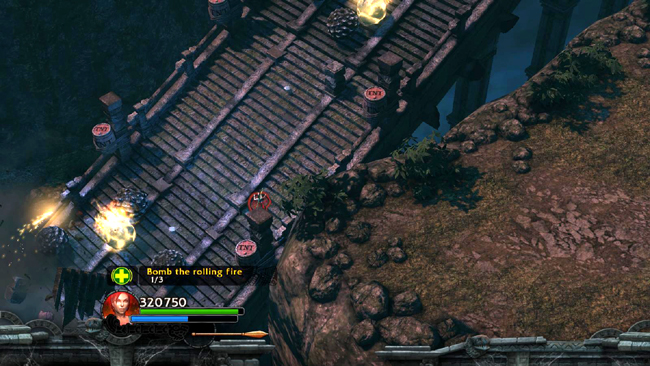
With each successful hit, a message flashes on screen showing the number of fireballs bombed.
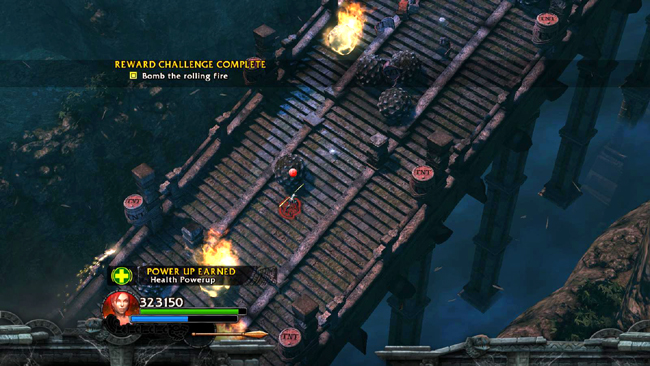
You must do this three times to earn the reward: a HEALTH POWERUP.
Continue to the top of the stairs, gather the last few gems and run through the exit.
[Return to the Twisting Bridge Walkthrough]
Copyright © - Stellalune (). All rights reserved. The screenshots and videos included here were made using Fraps. Feel free to copy or print this walkthrough for personal use. By all means, share it with friends, but please include this credit line so people can send me their feedback. No part of this walkthrough may be reproduced on another site without permission. Follow this link for details about this site's advertising and privacy policy.
|