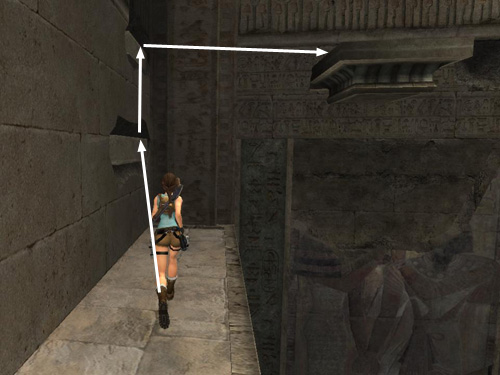
As you run from CHECKPOINT 6 to the opposite end of the long ledge, jump to grab the lower of the two handholds. Jump up to the higher one and then jump back to grab the retracting ledge behind you.
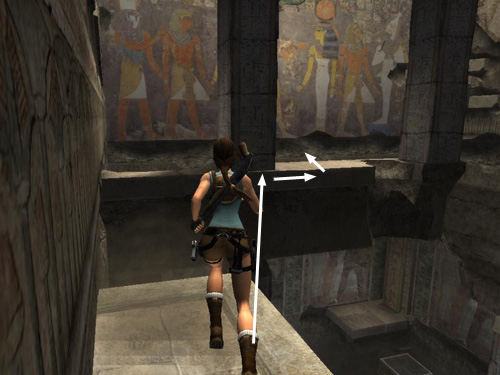
Pull up, run across the ledge as it retracts into the wall, and jump to grab the narrow ledge spanning the middle of the room. Try to aim for the narrow bit of the ledge just in front of the square column. If you aim to the left of the column, Lara may land on the ledge instead of grabbing it, and you'll have to take an extra second to drop back and hang. Traverse to the right and pull up next to the column. Then run off the other side and grab the edge as Lara falls.
NOTE: The early drafts of this walkthrough included a longer, more difficult method for the next part of the sequence. If you want to try it that way, you'll find the old method here. However, I found the following shortcut considerably faster and easier. My eternal gratitude goes out to Invader for bringing this excellent trick to my attention.
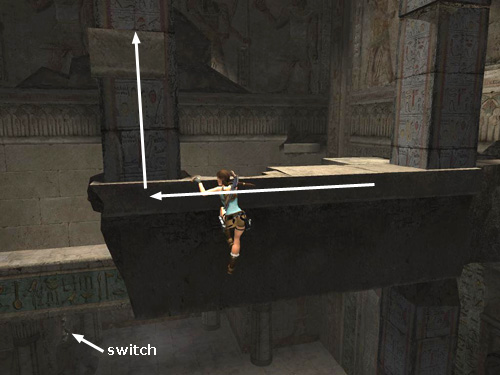
After grabbing the edge of this ledge, the big, colorful mural on the wall will be behind Lara and the alcove with the switch is ahead and below. Climb to the left (i.e., continue toward the center of the room). When you reach the end of the ledge, jump up to grab the handhold above.
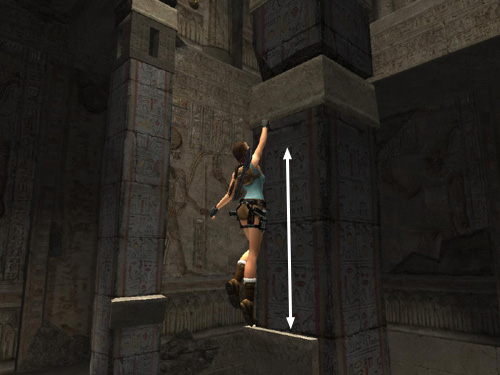
Jump straight up again as if you were trying to grab the handhold above. Lara cannot reach it and will drop back down to the handhold where you started.
IMPORTANT:This seems to be a useless maneuver, but for some reason it enables you to do the next move with nearly 100% success. If you try to jump back and grapple the hook above without first jumping up toward the higher handhold, often the grapple won't catch. Try it if you don't believe me.

Now, lean away from the column toward the painted wall behind Lara. Jump back and quickly press Grapple to snag the metal ring on the wall above the mural. Lara should do this easily, provided you've done the "useless" jump in the previous step.
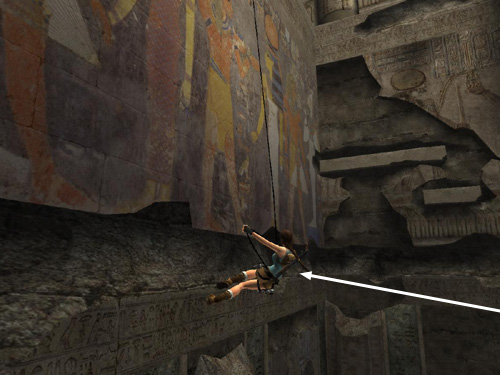
She'll end up hanging from the grapple cable with her feet a little below the bottom edge of the mural.

Adjust the length of the cable so her feet are at about the bottom of the central painted figure's kilt (as shown above) or a little lower.

Wall run back and forth a few times to build up momentum. Then jump to the left to grab the handhold near the corner. (NOTE: When wall running, it may help to keep the camera perpendicular to the wall and directly behind Lara, rather than on an angle as shown in the screenshot. Then pressing Left + Jump will make her jump that way, instead of back. I just shot the picture this way so you could see the handhold.)
[Part 1 | Part 3 | Return to the Walkthrough]
Copyright © 2007- Stellalune (). All rights reserved. The TRA screenshots included here were made using Fraps. Feel free to copy or print this walkthrough for personal use. By all means, share it with friends, but please include this credit line so people can send me their feedback. No part of this walkthrough may be reproduced on another site without permission. As an Amazon Associate I earn from qualifying purchases. Follow this link for details about this site's advertising and privacy policy.
|