Strategy for fighting this creature is detailed in the walkthrough and in this video walkthrough.
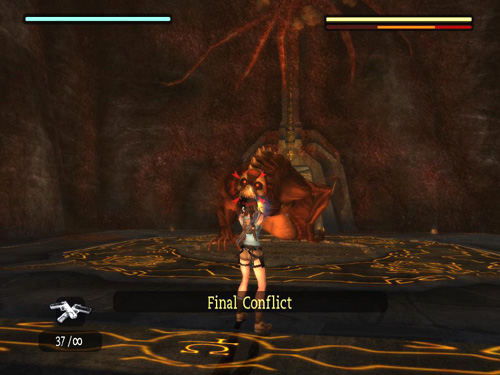
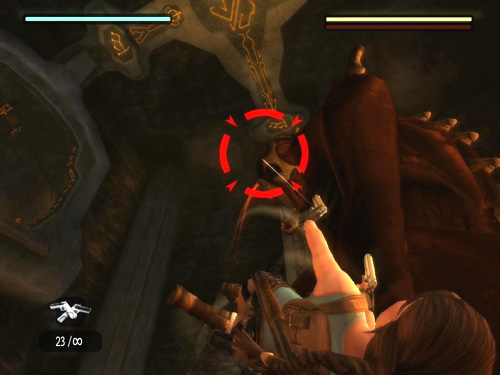
As soon as you regain control of Lara, get a Target Lock on the mutant and start firing. There's no need to move, since Lara is already in the perfect position. The goal is to enrage the beast before it gets too close.
If you have a lot of ammunition for the SMGs, use them. This fight will go much faster if you do. If not, the abomination can be defeated with any other weapon, including regular pistols (as shown here), though it helps if you can shoot very fast. You want to make the boss's rage bar fills up as quickly as possible.

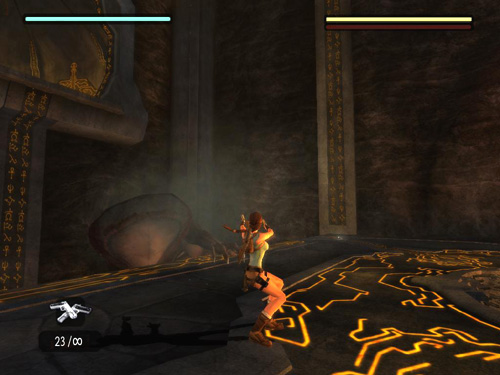
When the mutant becomes enraged, its rage meter will flash red.
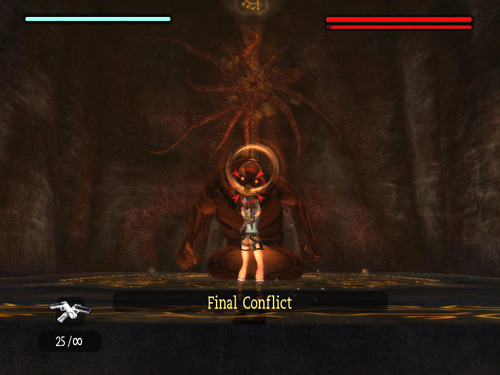
The creature will pause and let out a roar. You'll see "sound" waves emanating from its head (as shown above). Then it will charge.

As the mutant lunges toward Lara, the screen blurs and the action shifts into slow motion. Now you must do the adrenaline dodge and headshot maneuver. Stop shooting but continue to maintain a target lock.
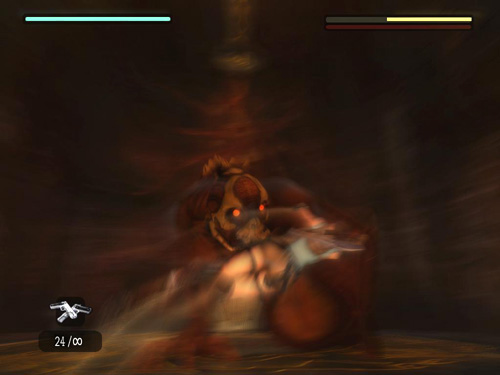
Move to the left or right and simultaneously press Crouch (or shake the nunchuk if playing on the Wii) to dodge.
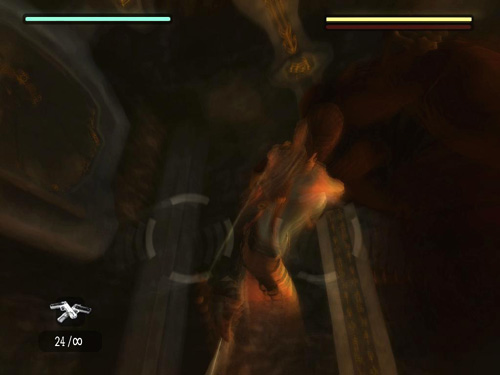
If your dodge is successful, Lara will leap to one side and you'll see 2 gray targeting reticles converge on the boss's head. In order to see this, you may need to shift the camera to point directly at the enemy.
When the reticles overlap and turn red, fire. (In the Wii game, you'll see only one red reticle on the enemy's head. Use the remote to aim inside this target and then fire.)
If you do all this correctly, the headshot will connect, and the mutant will lunge toward Lara and roll past her off the edge of the platform.
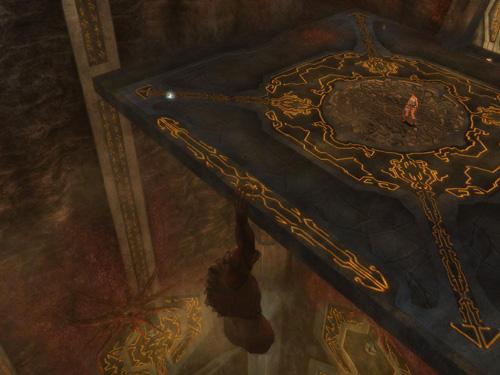
The first time this happens, a short cut scene shows the beast catching the edge with its right hand and dangling above the lava.
[Part 2 | Return to the Final Conflict Walkthrough]
Copyright © 2007- Stellalune (). All rights reserved. The TRA screenshots included here were made using Fraps. Feel free to copy or print this walkthrough for personal use. By all means, share it with friends, but please include this credit line so people can send me their feedback. No part of this walkthrough may be reproduced on another site without permission. As an Amazon Associate I earn from qualifying purchases. Follow this link for details about this site's advertising and privacy policy.
|