Geothermal Valley - Catacomb of Sacred Waters Challenge Tomb (Part 3)
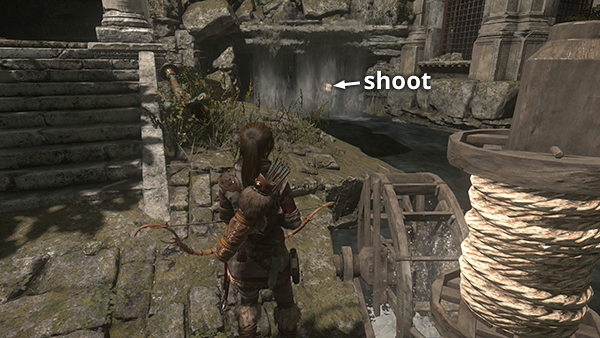
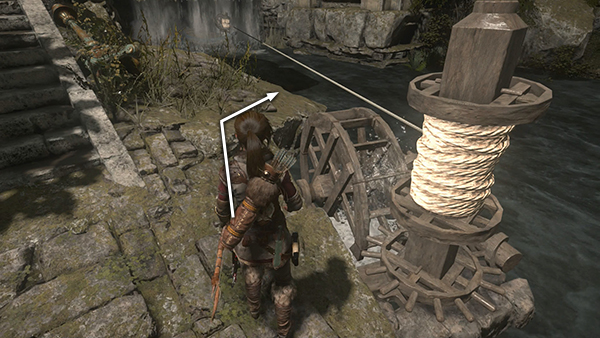
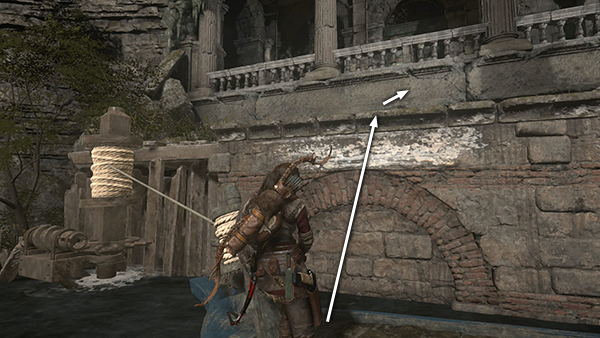
Return to the bottom of the steps and stand near the third rope-wrapped post. Shoot an arrow into the rope coil on the prow of a second boat, which is concealed behind the waterfall a short distance upstream. Once the line is anchored, the rotating post draws the boat out from under the falls and toward you.
Quickly move to the edge of the island, where it juts out over the water.
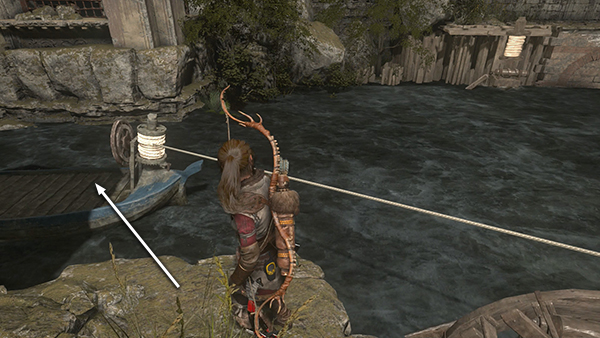
As the boat passes, jump onto it...
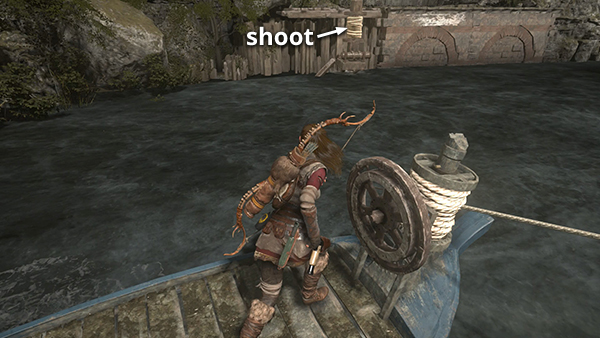
...move close to the rope coil and shoot an arrow into the fourth rope-wrapped post on the far side of the aqueduct.

Now use your axe to crank the winch, drawing the boat toward the fourth post.
As the boat moves alongside the ledge just downstream from the post, jump and grab onto the ledge above. Then pull up.
NOTE: If the boat drifts toward the edge of the falls with Lara standing on it, she'll go over the edge and die. But if the boat drifts on empty, it will end up in the lower corner of the pool. If you like, you can then try to retrieve it using a rope arrow anchored to the third post, jump onto the boat, anchor it to the fourth post, and then crank the line. I found it easier to just reload the checkpoint and try the sequence again.
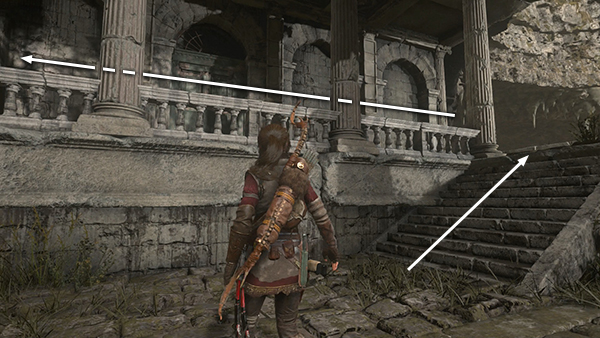
Climb the stairs into the building.
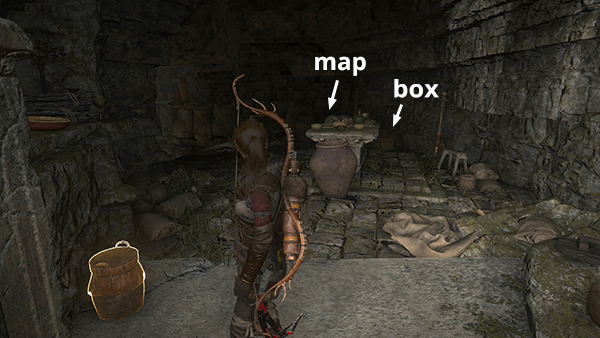
In the first room there's a container of cloth and an Archivist Map (5/9), which reveals the locations of any undiscovered documents and relics in this area. In the far corner, beyond the map table, there's a box of supplies.
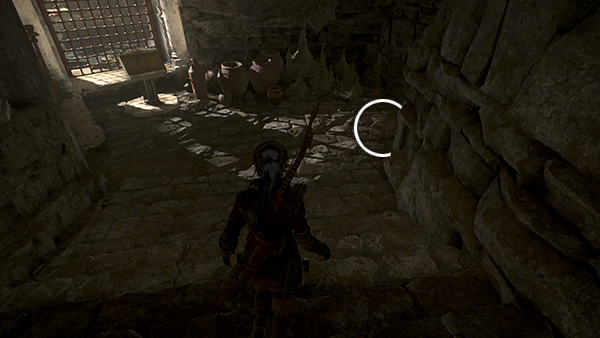
Move down the stairs to find the codex. Read it to unlock the Anatomical Knowledge skill, which allows you to see and target a prey animal's heart in Survival Instinct view. You'll also receive XP and 10,000 Expedition Credits if it's the first time you've raided this tomb. Before moving on, open the box lying on the floor to find a relic (7/13), a Goblet from the Icons of Kitezh set (circled in the screenshot above), and gather some cloth and mushrooms.
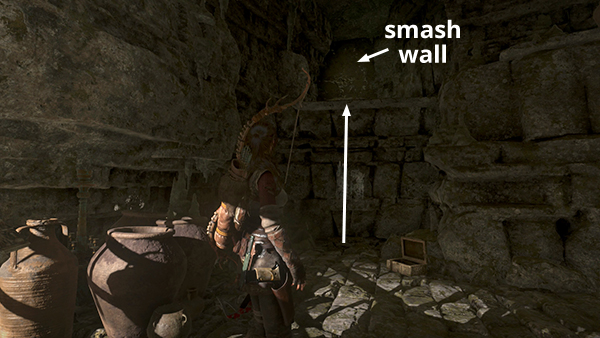
To get out of here, climb onto the ledge behind the box that held the relic. Then use your axe to smash through the crumbling wall into the passageway beyond.
You can now turn left and return up the zip line and through the BURIAL CHAMBER to the Aquifer Cavern Base Camp. From there you can fast travel back to the Aqueduct Ruins Base Camp (or any other camp).
Or, turn right, climb through the opening in the rocks, and return through the cavern the way you came.

Where you slid down the waterfall coming in, there's a climbable wall and ledges leading back to the upper tunnel.
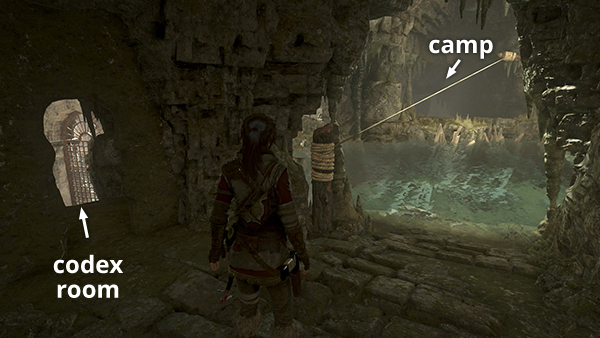
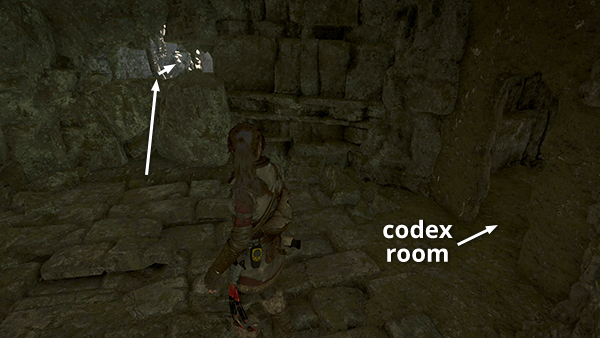
NOTE: If you missed any collectibles here and need to return later in the game, you can fast travel back to the Aqueduct Ruins Base Camp. The boat puzzle doesn't work a second time, but you can get back into the codex room from here. Start by dropping down into the BURIAL CHAMBER with all the skulls. Then go up the stairs to the cave with the pool and zip line. On the other side of the pool, on the right, is the doorway to the codex room that you made by breaking down the wall with your axe. (screenshot)
[Part 2 | Return to the Challenge Tomb Walkthrough]
Copyright © - Stellalune ( ). All rights reserved. Feel free to copy or print this walkthrough for personal use. By all means, share it with friends, but please include this credit line so people can send me their feedback. No part of this walkthrough may be reproduced on another site without permission. As an Amazon Associate I earn from qualifying purchases. Follow this link for details about this site's advertising and privacy policy.