Geothermal Valley - House of the Afflicted Challenge Tomb (Part 3)
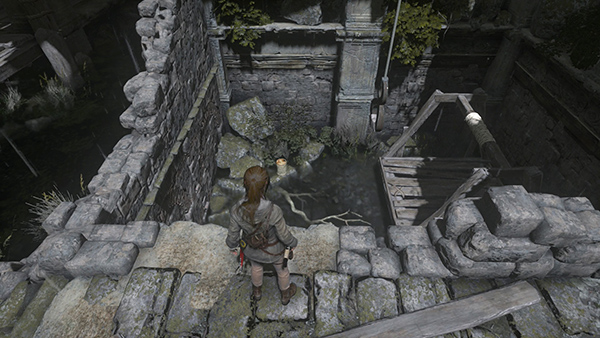
Drop down into the shallow pit to the left of the relic. Open the container for some cloth.
Then stand on the wooden platform, facing the 8-shaped metal bracket, and fire a rope arrow to attach the bracket to the platform.
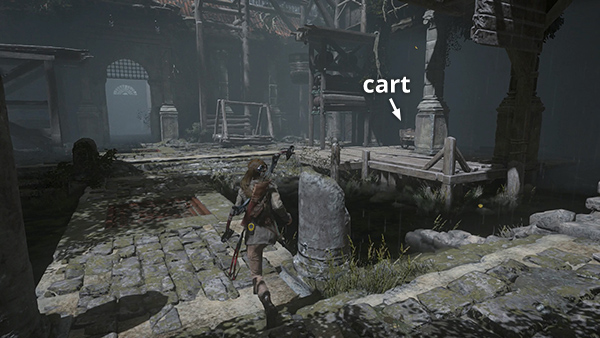
Climb up and go around to the cart sitting under the ledge on the right (when facing the entrance).
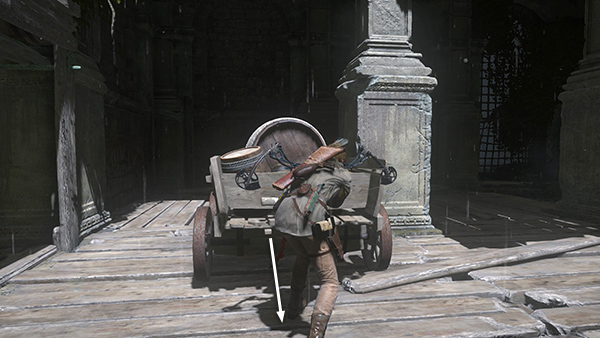
Pull the cart away from the wall as far as it will go.
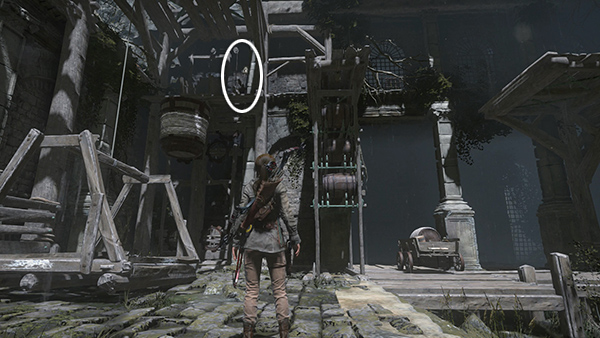
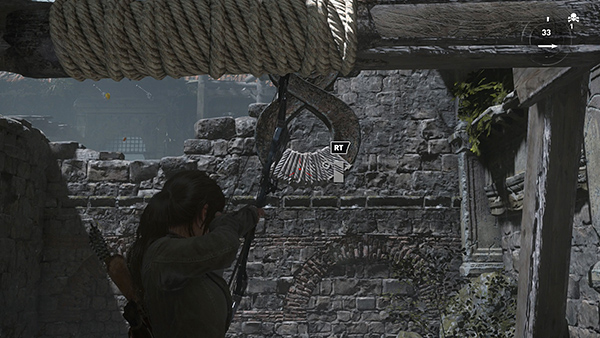
Now stand with the entrance and the first wooden platform on Lara's left and the cart ahead on the right. Look up to spot a rope-wrapped bucket and a lever just above and to the right of the bucket.

Shoot the lever with a rope arrow to pull it...
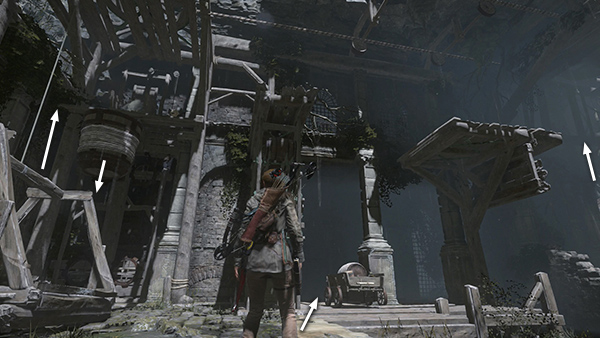
...opening a small hatch and causing water to flow into the bucket. As the bucket sinks, it raises the two platforms. Don't wait to watch this happen. Run forward to stand between the cart and the shelf stacked with barrels.
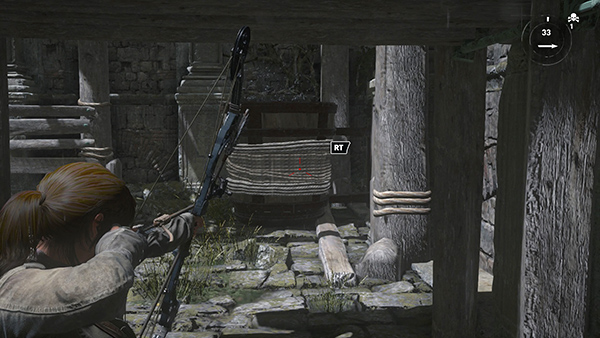
Turn left and shoot a rope arrow into the bucket...
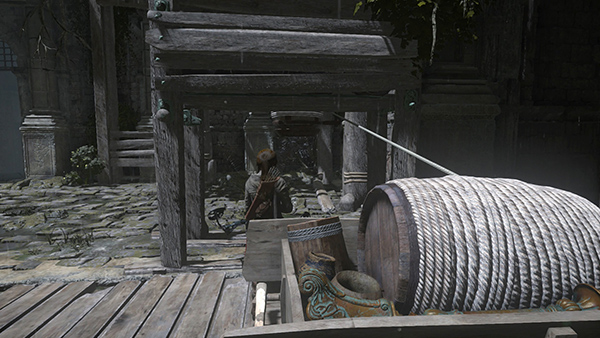
...anchoring it to the rope-wrapped barrel in the cart. You need to work quickly before the bucket rises again. If you don't manage it the first time, just pull the lever and try again.
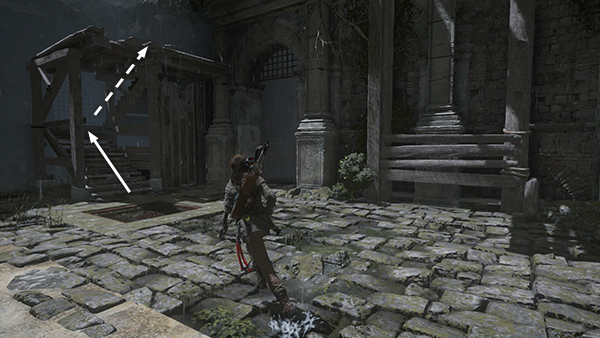
Once the bucket is anchored to the cart, the platforms remain raised, so you can take your time. Climb the stairs to the left of the entrance.
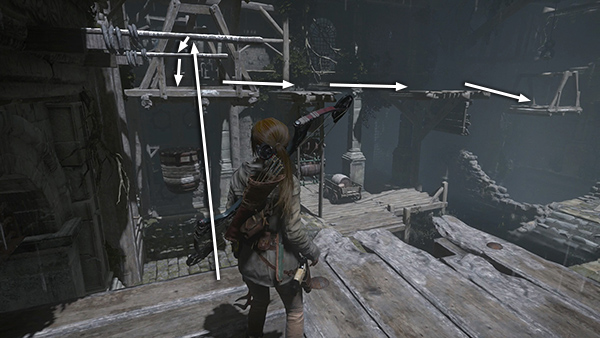
Swing across the horizontal bars to the first hanging platform and then jump across the ledges to the second platform.
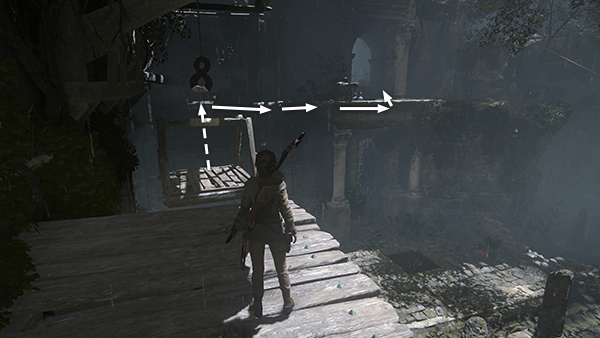
From there you can reach the handholds on the wall that will allow you to climb over to the room with the codex.
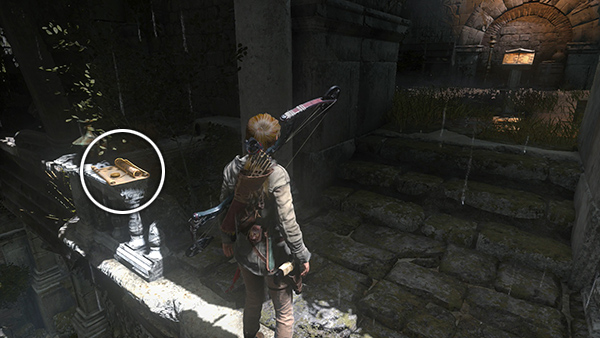
Before entering the room, read the document (6/33) sitting on the railing to the left. It's called Hinterlands and belongs to the House of the Afflicted series (Greek). Enter the room and find a box of supplies; plus more mushrooms, cloth, and herbs; an Archivist Map (2/9) revealing the locations of various items you've already found if you followed this walkthrough, and the codex itself. Read it to unlock the Fast Healer skill skill and gain XP, as well as 10,000 Expedition Credits if this is your first time beating the tomb.
[Part 2 | Part 4 | Return to the Challenge Tomb Walkthrough]
Copyright © - Stellalune ( ). All rights reserved. Feel free to copy or print this walkthrough for personal use. By all means, share it with friends, but please include this credit line so people can send me their feedback. No part of this walkthrough may be reproduced on another site without permission. As an Amazon Associate I earn from qualifying purchases. Follow this link for details about this site's advertising and privacy policy.