STELLA'S LARA CROFT GO WALKTHROUGH - Android, iOS, PS4 and Vita, Steam, and Windows Phone/PC/Tablet
THE ESCAPE - PART 3: A BRIDGE TO DAYLIGHT
Updated: 9/17/15(†)
Relic Fragments: 1
Gems: 2
Follow this link for my video walkthrough.
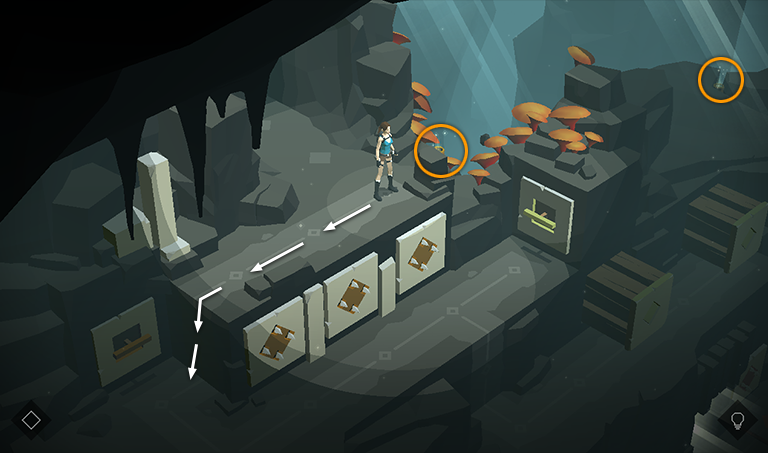
Smash the 2 vases off to the right. One is next to the ledge where Lara is standing. The other is in the background in the upper right corner. Both contain TOPAZES (6/7 and 7/7). Then climb to the switch.
NOTE: If you're playing the original game without the Shard of Life and Mirror of Spirits expansions, this will be the last level. If you have found all the gems in all previous levels, you will now unlock the MIDAS LARA OUTFIT. To change outfits, return to the main menu. Rotate the menu items until the watch (labeled "Outfits") is visible. Select it to examine and equip any outfits you've purchased or unlocked. If you missed any gems, you can replay any previously completed level by selecting it from the journals in the main menu ring.
If you are playing the game with the two expansion packs, you'll need to collect all the gems in those levels as well in order to unlock the MIDAS outfit.
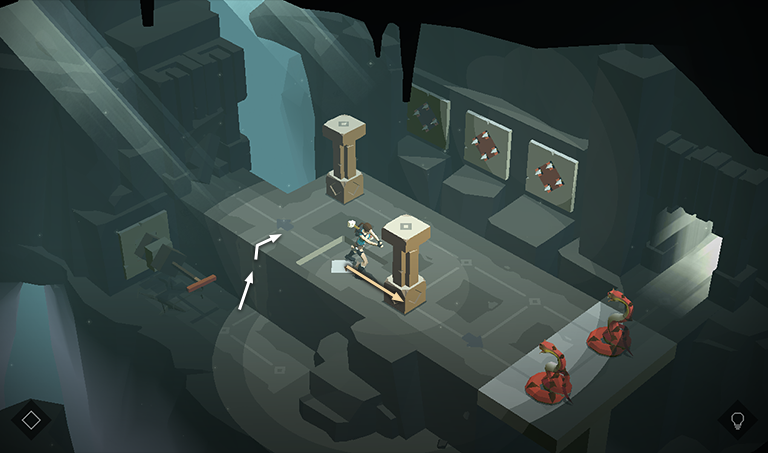
Pull the switch to temporarily deactivate the arrow traps. Then move to the right to the second switch.
Pull the second switch to retract the block traps on the ledge below. Then drop down there as the first switch retracts and the arrow traps reactivate.
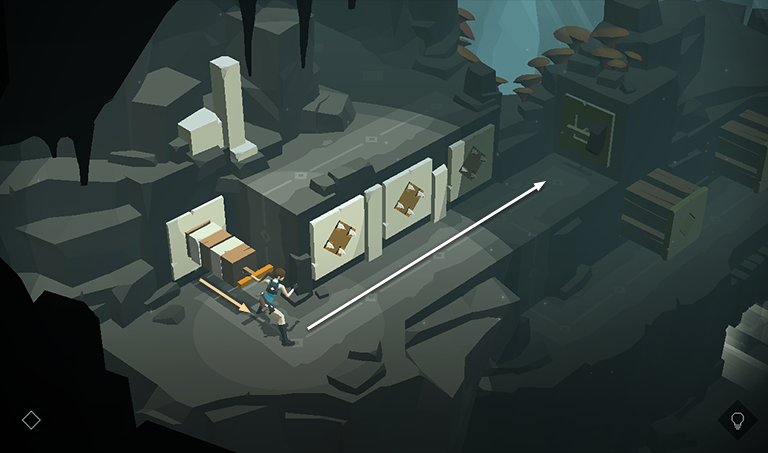
Move to the right three spaces, then back to the left once...
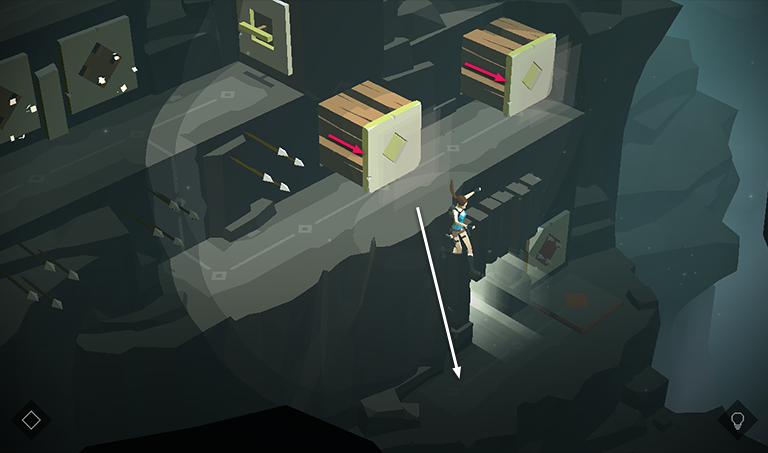
...so that when the block traps pop out again, Lara is standing in front of the left block. This shoves her off the ledge onto the ledge below. (If you advance all the way to the right block, allowing it to push her off the ledge, she'll land in front of another arrow trap.)
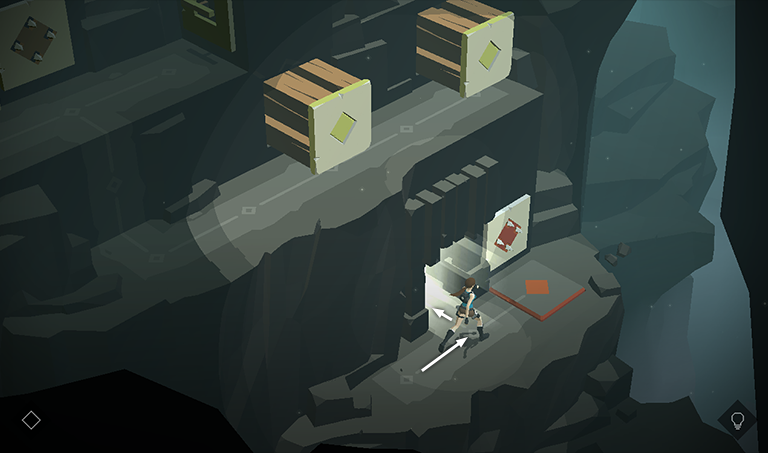
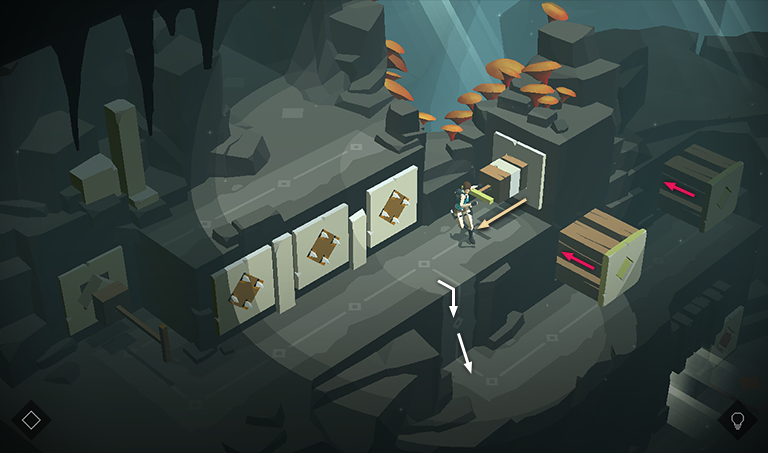
Avoid the arrow trap and proceed through the well-lit doorway.
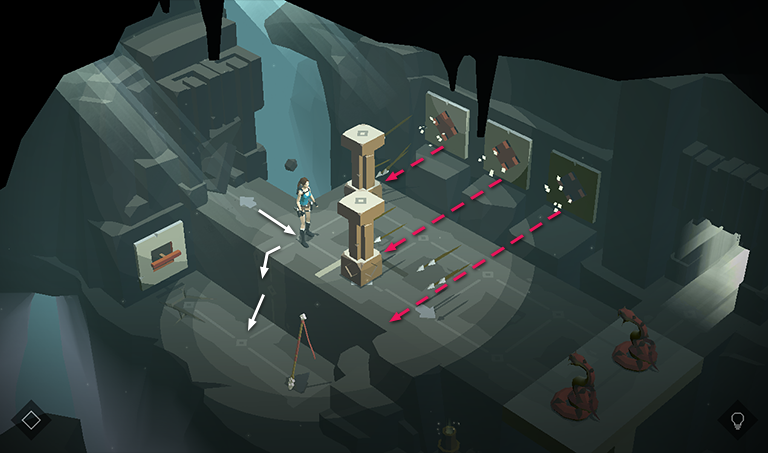
In the next area, step forward once. The first of the 2 pillars shields Lara from the arrow trap behind it. Leave the pillars where they are for now and drop down onto the ledge below.

Step to the right and grab the SPEAR. Smash the vase on the other side of the rock pile to obtain the last fragment of THE NECKLACE OF DREAMS (3/3).
NOTE: If you've found the other two pieces of this relic as well, you'll now unlock the CATSUIT OUTFIT. If you're playing the original game without the Shard of Life and Mirror of Spirits expansions, this will be the last level. If you've completed all the relics in the game you will now unlock the Curator achievement, and if you've found all the gems as well, you'll get the Preservation Society achievement for smashing all the vases in the game. See the note above about changing outfits. If you are playing the game with the two expansion packs, you'll need to complete those levels as well in order to unlock these achievements/trophies.
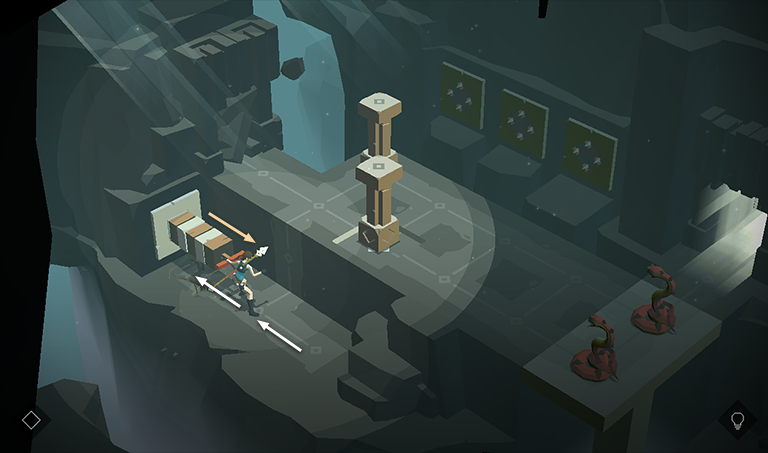
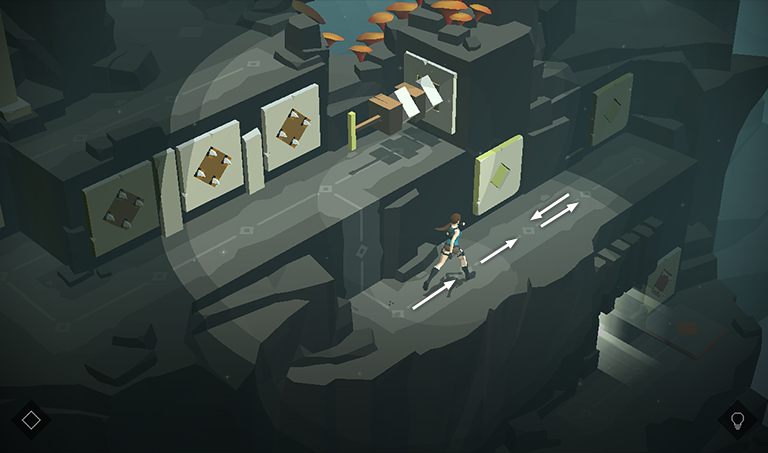
Once you have the SPEAR, move to the left, onto the cracked floor, and pull the switch to temporarily deactivate the arrow traps. As with the previous timed sequences, you now have six turns to clear the traps before they reactivate.
Grab onto the wall, pull up onto the ledge, and push the lower pillar once—from the pressure pad onto the space to the right of it. (That's three turns.)
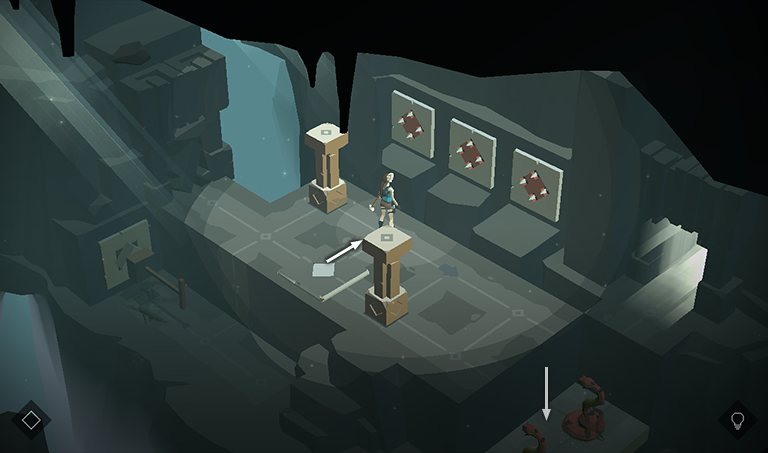
Move off the pressure pad toward the upper right. This cause the pale gray platform with the 2 snakes to sink to the level below.
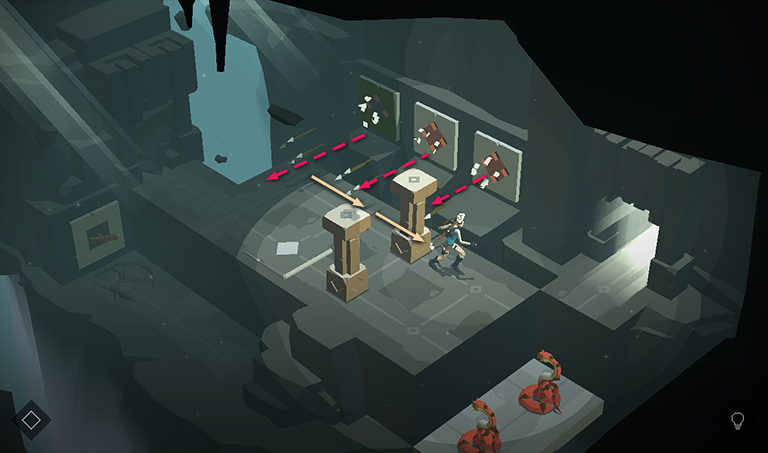
Then pull the upper pillar twice to the right. By the time the switch retracts and the arrows start flying again, Lara should be out of the way.
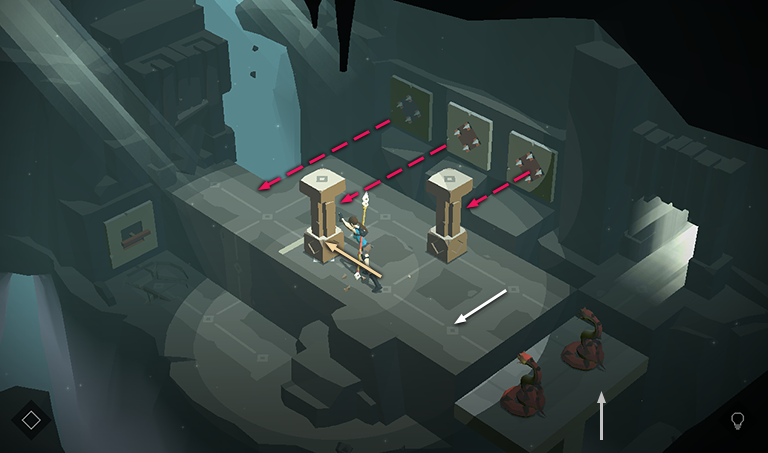
Step to the lower left and push the first pillar onto the pressure pad. The second pillar shields Lara from the arrows. With the pad depressed, the gray platform with the 2 snakes returns to its original position.
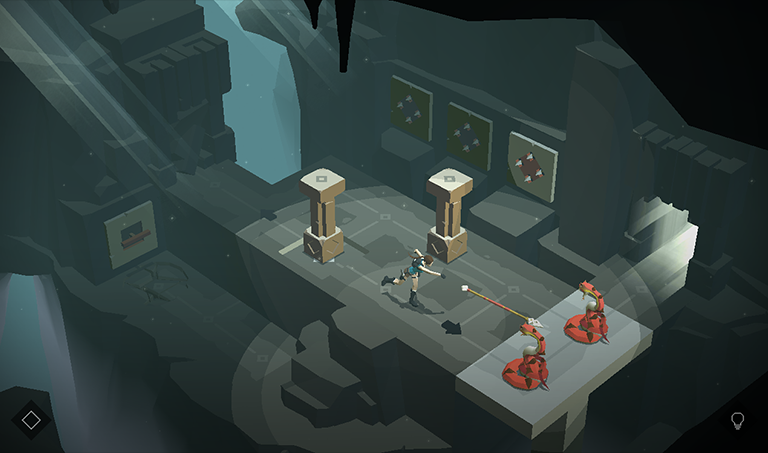
Without moving from the safe spot between the pillars, throw the spear to kill the snake on the left.
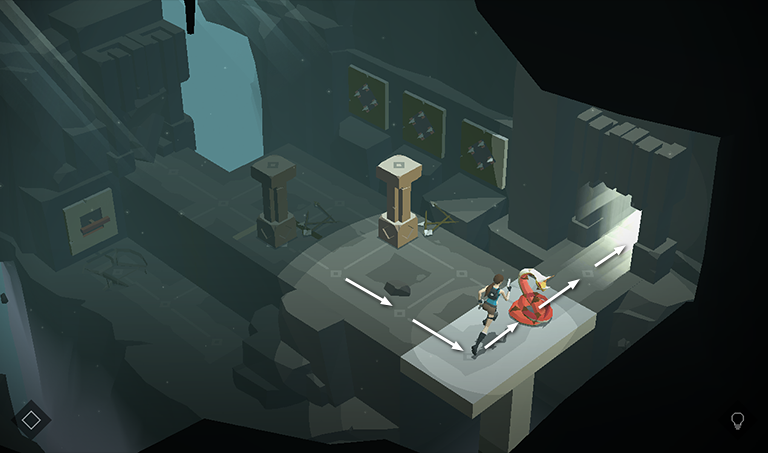
Now you can move forward to the spot where the first snake was and kill the second snake by approaching it from the side. Then continue through the doorway.
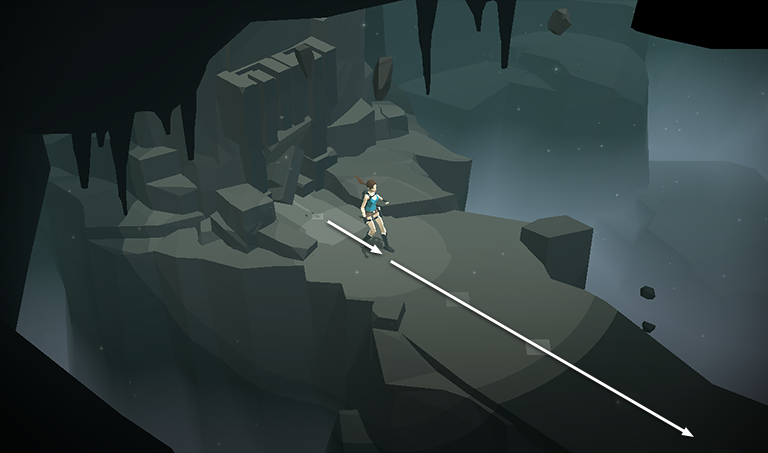
In the final area, take a step forward to trigger the closing cinematic, in which Lara makes a perfect tomb raider's escape.
- THE END -
If you like, you can now continue with the Shard of Life and Mirror of Smoke expansions. More info can be found on the LCGO intro page.
†UPDATE HISTORY: 9/17/15 - Walkthrough first posted, along with video.
WAS THIS WALKTHROUGH HELPFUL? If not, I apologize and invite you to contact me with any questions. If you need help right away, I recommend the r/TombRaider subreddit. Other fan-run forums are listed at tombraiders.net/stella/community.html. If this site was useful, please consider supporting it financially or in other ways. For details, visit tombraiders.net/stella/support.html. As always, I welcome your corrections/suggestions. Thank you!
Copyright © - Stellalune ( ). Screenshots were made using the Andy Android emulator. Feel free to copy or print this walkthrough for personal use. Share it with friends if you like, but please include this credit line so people can send me their feedback. No part of this walkthrough may be reproduced on another site without permission. As an Amazon Associate I earn from qualifying purchases. Follow this link for details about this site's advertising and privacy policy.
Stella's Tomb Raider Site: tombraiders.net.