This sequence is also shown in a short video walkthrough.
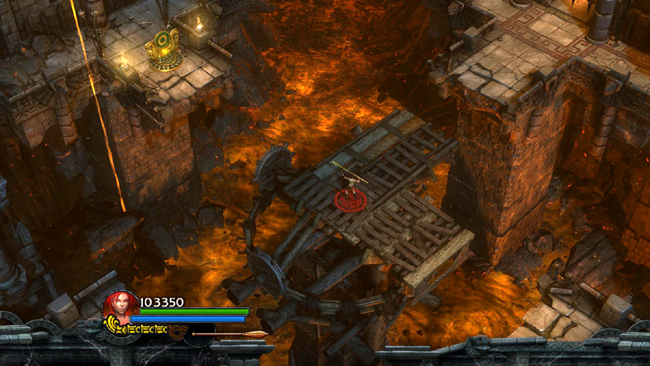
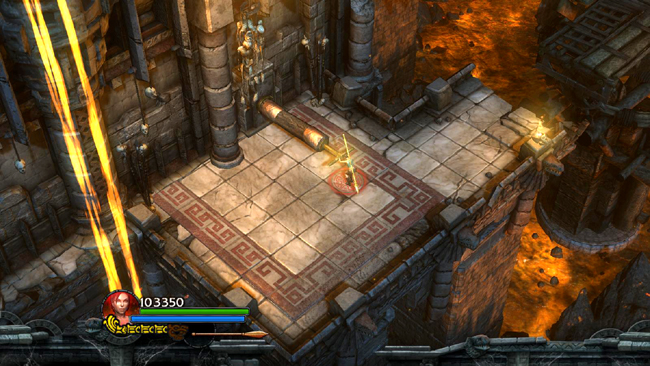
Jump onto the L-shaped wooden platform in the middle of the lava pool. Shoot the bull's-eye switch on the ledge ahead twice. . .
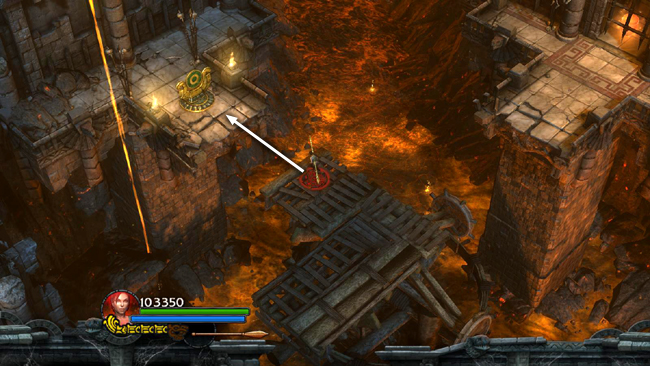
. . . so the L-shaped platform points NW and SW. Jump across to the bull's-eye.
Plant a bomb next to it. Then jump back to the L.
Then jump over to the ledge to the SW.
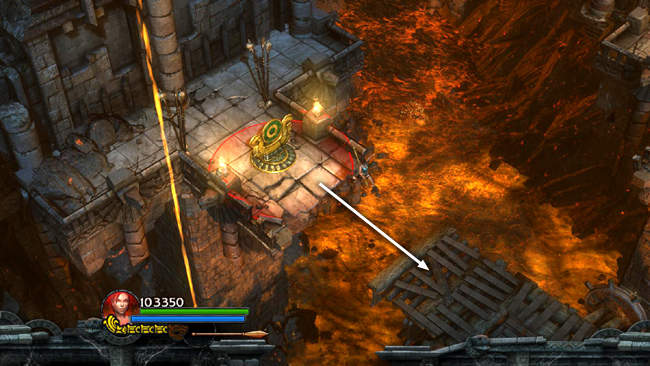
Pull the golden handle to open the barred alcove all the way across the room to the NE.
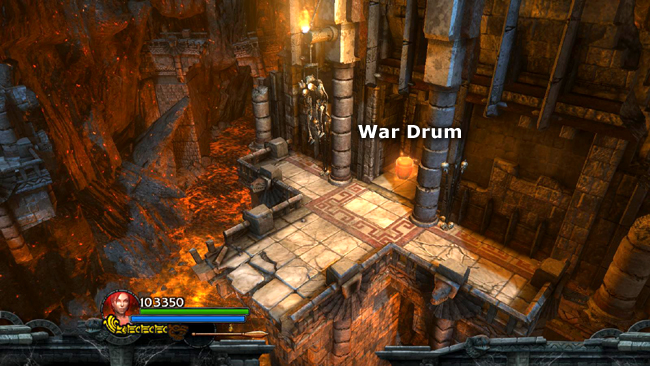
The first time you pull the handle, the camera shifts to show the alcove opening. You may want to wait for the handle to retract, pull it again, and then attempt the timed run without having to wait through the cut scene.
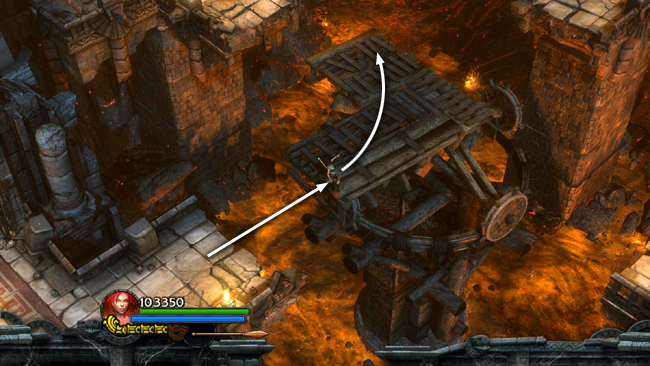
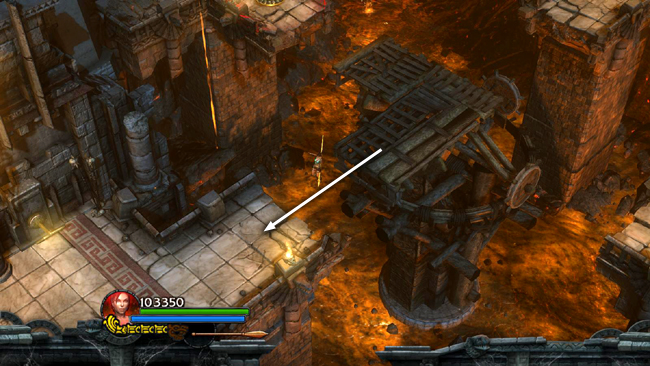
In order to reach this alcove before it closes, release the handle, run toward the L-shaped platform and just before you jump onto it detonate the bomb to flip the switch and begin turning the platform. Run across it as it's moving. . .
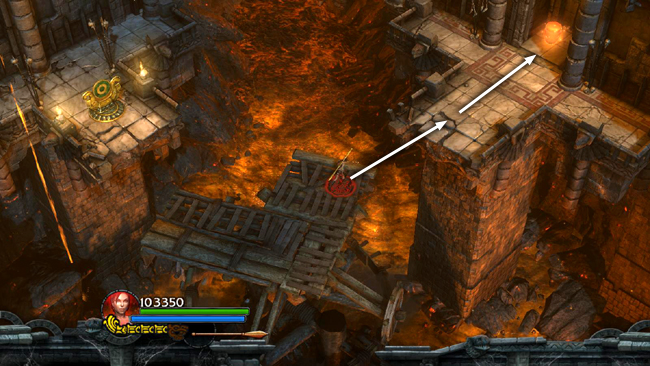
. . . and jump onto the ledge ahead. Run/roll forward into the alcove before it closes to claim the War Drum Artifact (+ weapon, + bomb).
[Return to the Fiery Depths Walkthrough]
Copyright © - Stellalune (). All rights reserved. The screenshots and videos included here were made using Fraps. Feel free to copy or print this walkthrough for personal use. By all means, share it with friends, but please include this credit line so people can send me their feedback. No part of this walkthrough may be reproduced on another site without permission. As an Amazon Associate I earn from qualifying purchases. Follow this link for details about this site's advertising and privacy policy.
|