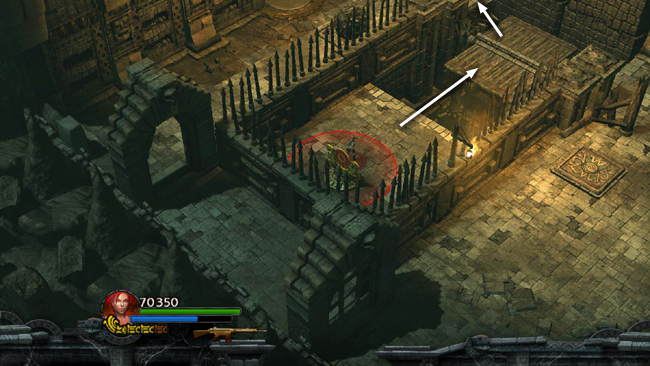
Inside is a single large room with a spike pit on the right, a corridor with a gate at each end on the left, and a shiny relic in a barred alcove on the far side of the room. The pressure pad near the entrance opens the relic alcove, but you'll need to find something to hold the pad down.
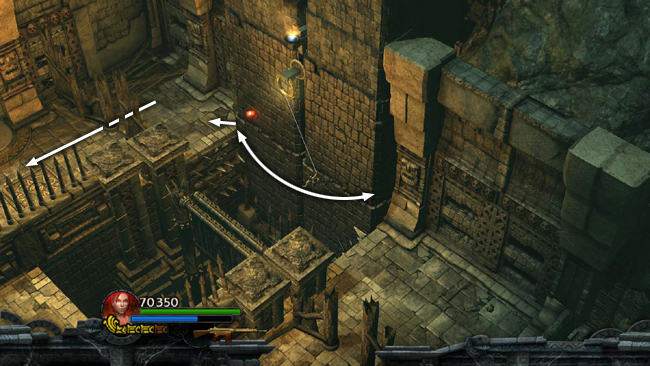
Use the golden ring high on the NE wall to grapple-swing across the pit, snagging another red skull (3/10) in the process.
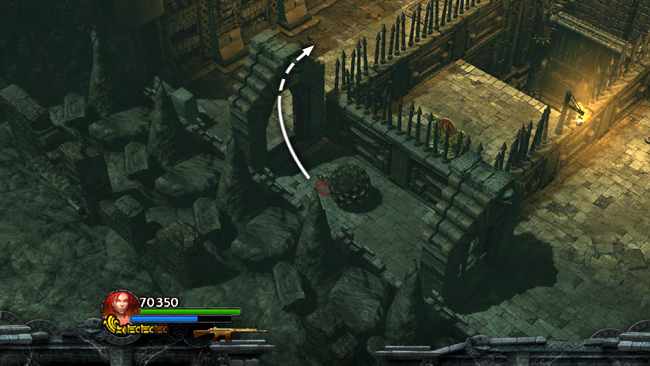
On the other side of the room, go around to the left and roll the huge ball out of the hallway. . .
. . . and onto the pressure pad near the relic. This raises a wooden ledge above the spike pit.
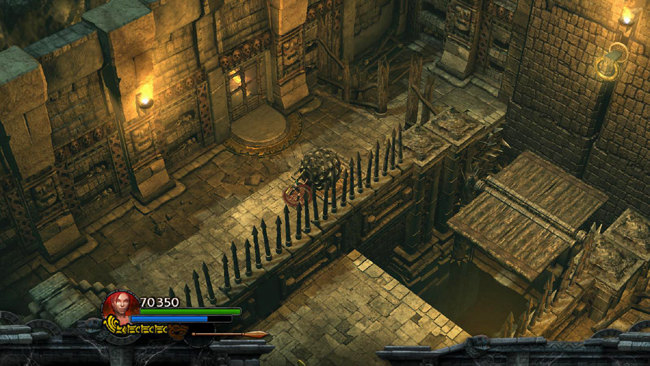
Use that ledge to jump across the pit to the bull's-eye switch.
Plant a bomb there, but don't detonate it yet. Jump back across the wooden ledge.
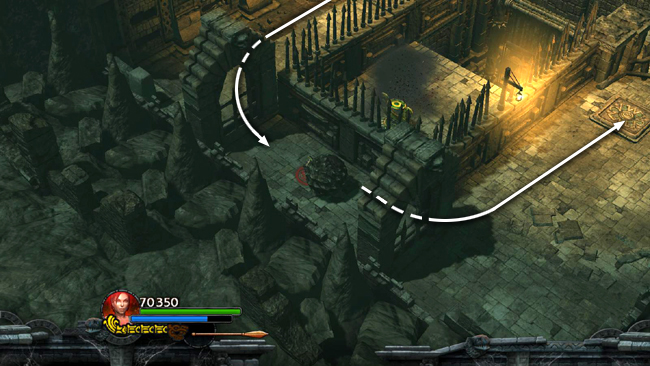
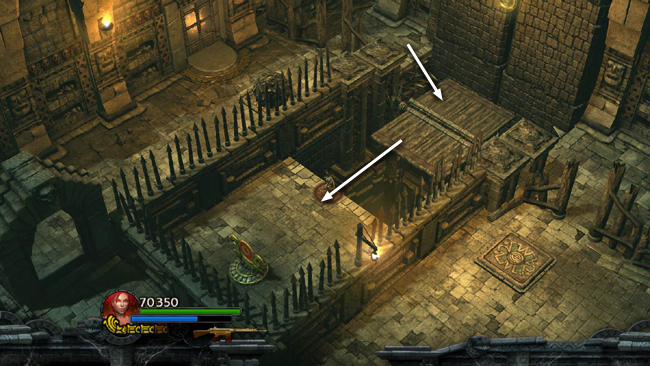
Then roll the ball off the pad and back into the hallway where you found it. Once inside, detonate the bomb to flip the switch, closing the NW door and opening the SE door. Roll the ball onto the pressure pad near the entrance.
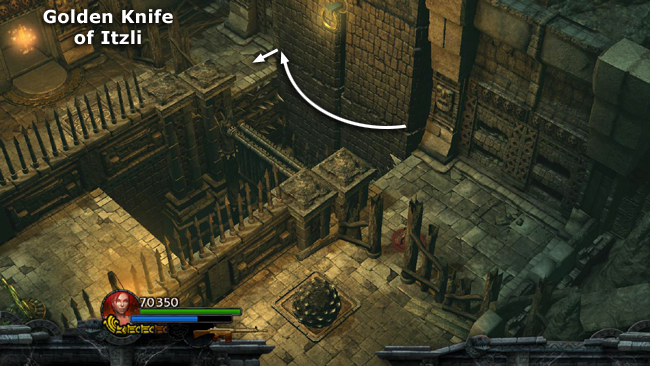
This opens the gate over the relic and keeps it open. Grapple-swing across the pit once more and claim the Golden Knife of Itzli Relic (Power Shot and Power Bomb). Then swing back across the pit and return upstairs and outdoors.
[Return to the Twisting Bridge Walkthrough]
Copyright © - Stellalune (). All rights reserved. The screenshots and videos included here were made using Fraps. Feel free to copy or print this walkthrough for personal use. By all means, share it with friends, but please include this credit line so people can send me their feedback. No part of this walkthrough may be reproduced on another site without permission. Follow this link for details about this site's advertising and privacy policy.
|